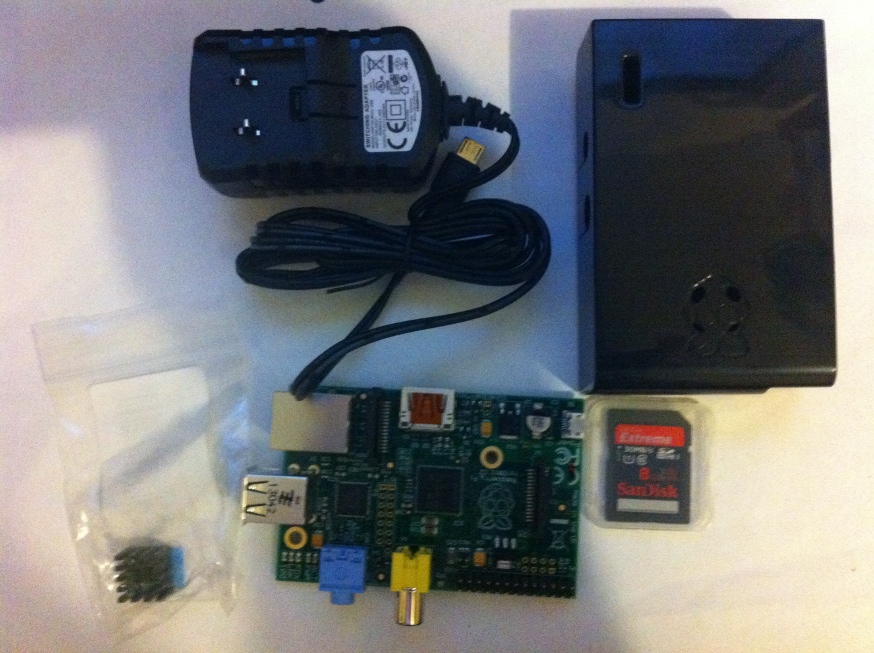
If you ever though about running a Tor node and contribute some bandwidth to the community, but you don’t have a dedicated machine to do so or the machine would be terribly loud, there is an incredible easy way available for you. You can buy yourself one of these tiny, power-saving and absolutely quite Raspberry pi’s and setup a Tor node with it. I will describe how I have done this in the following.
My shopping list:
Power Supply link
SD card (2 GB or larger) link
Raspberry pi link
Housing for the pi link
extra cooler link
I added the links to amazon as well; not that this is always the best choice to buy, but it will get you an idea what to buy. I have chosen a bit of a faster SD card to not have to wait to long while copying the data to the SD card.
All sum-up to 82,27 € for the complete setup.
The additional cooler is completely optional. I usually order these extra coolers because they tend to be really cheap and therefore “Why not?”. To open the housing there are four clips on the bottom side. Just push them a bit to the outside and it will open.
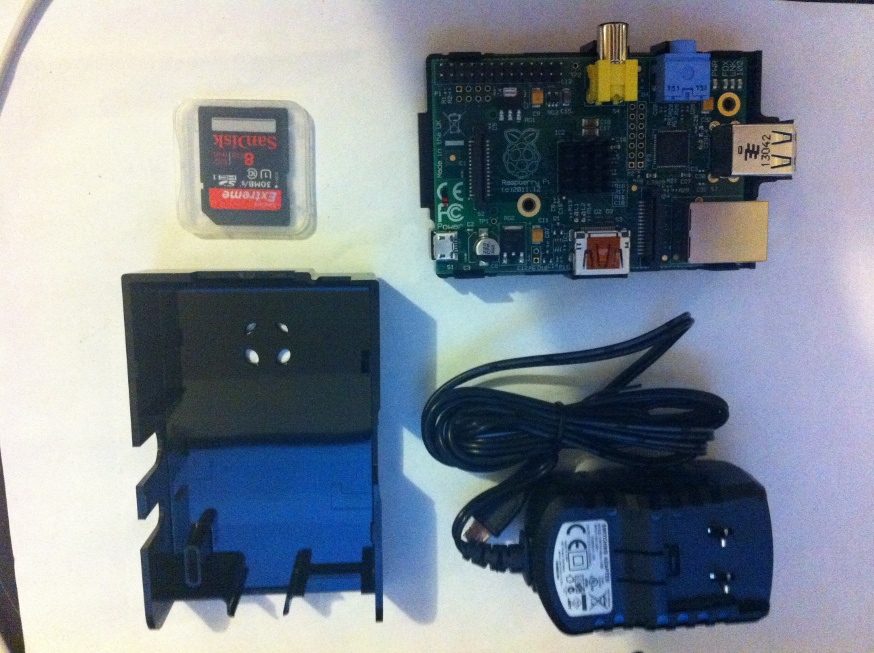
Simply stick the cooler on the processor and push the Raspberry pi into the bottom housing. The complete assembly can be done without any screws, which is kind of nice. In the picture above you can see how it should look like after these steps. The picture below shows your new Tor node after closing the housing. I have chosen the backside because you are able to see the mentioned four clips in this perspective.
Having all this done you can start downloading the image for the SD card. I have gone with Raspbian “wheezy” which you can download here. While the download finishes you can start to search the SD card reader. I think I have more than 3 of these things, but I personally never can find one when needed. If you are on Windows you can use win32diskimager to clone the operating system to the SD card. I assume that you are sitting on a *nix box for the following commands. As image names or size may be changing over time the output should look similar to this but has not to exact this output:
1 2 3 | |
Now it is time to have a look to which device we would like to clone the freshly decompressed image file. df -h will show you which filesystems are present, now plug in your card reader/writer with the SD card inserted and run df -h again. From the difference of both outputs you will know which device you has to unmout to clone. It is simply that file system, that wasn’t present beforehand. Another hot tip on *nix: It should be something similar to /dev/sdb or /dev/sdc.
1 2 3 4 5 6 7 8 9 | |
All data on the SD card will be overwritten, so please think now if there is data on it you might need later on. Otherwise, if the SD card is already empty or the data isn’t needed anymore, clone the OS to SD card.
1 2 3 4 | |
After starting the cloning process, you can get yourself a coffee. There is enough time to get it while cloning. After the transfer is finished, take your SD card and insert it to the Raspberry pi. This is a thing I really liked, you are able to insert or remove the SD card without opening the housing.
Now it is time to wire up your Raspberry and connect power and Ethernet. It will boot up and fetch itself an IP Address form the DCHP server in your network. You can find out the IP Address by looking at the DHCP Server, ping through the whole network or you simple know which IP Address it has to get. Let’s assume that my node got the internal IP Address 192.168.1.139.
1 2 | |
Default username for connecting is “pi” and the default password is “raspberry”. You definitely want to change the default password as the next step right?
1
| |
This should do the trick and you can set a secure password now.
As a next step we want to add the Tor project package source and then add the gpg key used to sign the packages.
1 2 3 4 5 6 7 8 | |
Now we can get up really close to it. Install the Tor package and do not forget to update all packages before.
1 2 3 4 | |
As the package is prepared to have Tor running with the user “debian-tor” you can either change the permissions to meet another user or you create this user on your system.
1 2 | |
Let’s go for adding the “debian-tor” user to the system and set a random password for him. For editing the configuration of Tor you need to edit the file “/etc/tor/torrc”. Choose your favourite editor, which is either already installed or you should be able to install it via apt-get, and edit the configuration to fit your needs. At least you should have to have this lines adopted:
1 2 3 4 5 6 7 8 9 | |
I personally prefer to disable all logging on that divice as much a possilble, there I commented every line regarding logging out. Saving the file and restart your raspberry.
1
| |
After your Pi has successfully restarted, the Tor process is already started and you should have a look at /var/log/tor/log for any problems around building circuits, connectivity or access on the configuration file. I recommend to setup a dedicated IP on your DCHP for the Tor node or configure your node to use a static one. As this highly depends on the DCHP server you are using I will not cover this here. And you are done. Incredibly easy right?


